REVIEW · UBUD
3 Hours Wheel Throwing Basic Ceramic Class
Book on Viator →Operated by Local Experiences · Bookable on Viator
That first lump of clay is always awkward.
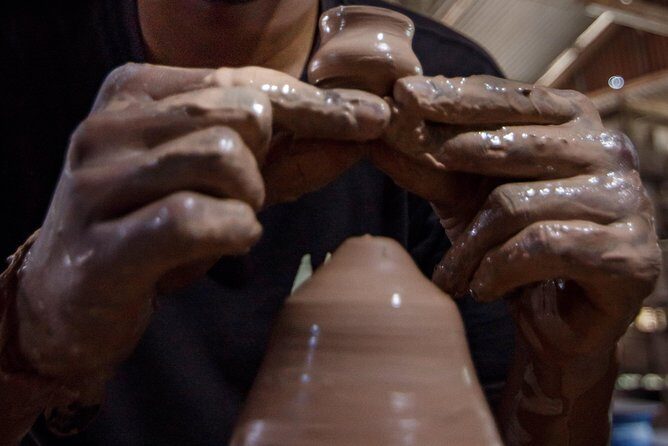
Then the wheel starts to make sense. This 3-hour basic wheel-throwing ceramic class in the Ubud, Bali area is held inside a working factory, so you’re not just watching a demo. You learn how to scale and knead clay, how the wheel machine works, and the basic balancing tricks for forming a pot or bowl using your hands.
I especially like that you get real hands-on time with the wheel throwing machine, not just a paint-and-try session. I also like the clear take-home limit: you can choose your best three creations to bring home, and the team can help you with glaze and baking for a later pickup window.
One thing to consider: the in-class 3 hours do not include the firing process. If you want fully finished pieces with combustion and glaze, you’ll be looking at extra steps and time after class.
In This Review
- Key points to know before you go
- Wheel Throwing in Ubud: What the 3 Hours Actually Feels Like
- Getting Started at the Factory: Clay Source, Machine Basics, and Kneading
- The Main Event: Wheel Throwing With Hands-On Shaping
- Picking Your Best Three: What You Can Bring Home
- Coloring, Glaze Help, and the Real Timeline for Finished Ceramics
- Price and Value: $50 for Shaping, Plus What Might Cost Extra
- Logistics That Matter: Meeting Point, Private Setup, and Weather
- Who Should Book This Wheel Throwing Class (and Who Might Not)
- Practical Tips to Get Better Results Fast
- Should You Book This Class? My Honest Call
- FAQ
- How long is the wheel throwing class?
- Where does the class start, and does it end there too?
- What is included in the $50 price?
- What is not included?
- How much clay will I use during the class?
- How many pieces can I take home?
- Is glazing and baking included?
- How long does combustion and glaze take?
- Is this class private?
- What if weather is bad?
Key points to know before you go
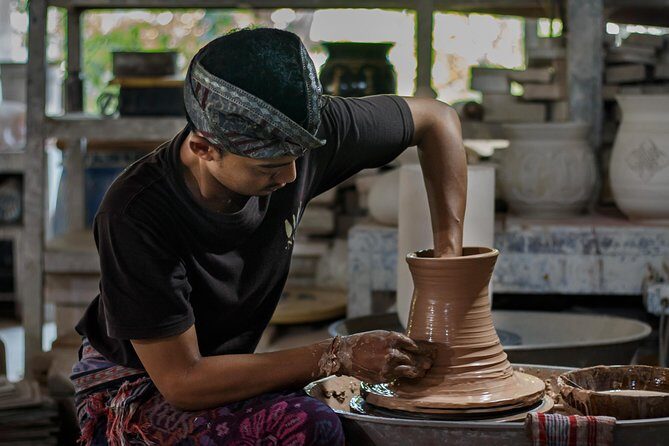
- Working factory setting: You’ll learn in a real ceramic workspace with tools, materials, and machinery in use.
- 3 kg of clay to experiment: You start with enough clay to try multiple shapes and see what works for you.
- Wheel + hand technique basics: Expect instruction on the machine and the hand-balancing moves that shape the clay.
- Choose the best three pieces: You can take home up to three creations, after narrowing down your favorites.
- Firing and glazing are later: Combustion and glaze take 1 week to 4 weeks, and it is not included during class.
- Private, group-only session: This is a private activity, so you won’t be squeezed with strangers.
Wheel Throwing in Ubud: What the 3 Hours Actually Feels Like
This class is built for beginners who want a practical start, not a craft-history lecture. In the first moments, you’ll be introduced to the clay itself and the basic types used in ceramics, then you’ll jump into the physical work: scaling out your clay portion and kneading it so it’s ready for the wheel.
The good news: you’re not expected to make one perfect masterpiece in one go. You’ll experiment. The class is designed around building comfort with the wheel, so you can try, fail a little, learn fast, and try again.
Also, you’re not just using random materials. The class happens in the provider’s own factory, where you can see the tools and machinery used in daily ceramic production. That matters because it helps you understand the process as a whole: shaping is only step one.
And yes, you’ll still end the session feeling proud. Even a simple bowl shape looks different when it’s your own.
You can also read our reviews of more tours and experiences in Ubud


Getting Started at the Factory: Clay Source, Machine Basics, and Kneading
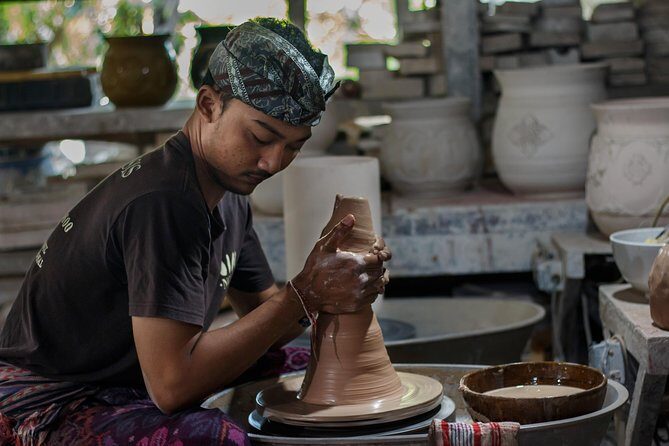
You’ll begin with the basics of clay—where it comes from and the type of ceramic you’re working with. Then comes a part many people underestimate: scaling and kneading.
Scaling means portions are measured (you’ll work with enough clay for serious experimenting; the class notes up to 3 kg total, and also references working from around 2000 grams in the wheel-throwing explanation). Kneading is where the wheel session really starts to go well. Smooth clay throws better. Lumpy clay fights you.
Once your clay is ready, you’ll learn the basic knowledge of the wheel machine and how to use it. That includes the basic idea of how the wheel’s motion helps you shape the form, and how your hands guide the clay as it spins.
From there, instruction shifts to the physical technique: hand balancing while the clay forms into the shape you want. If you’ve ever tried to build something with wet clay, you already know the wheel can either help you or bully you. This class teaches you the “hand feel” so you’re not just forcing the shape.
Practical note: wear clothing you don’t mind getting splashed with clay. An apron is provided, but accidents happen.
The Main Event: Wheel Throwing With Hands-On Shaping
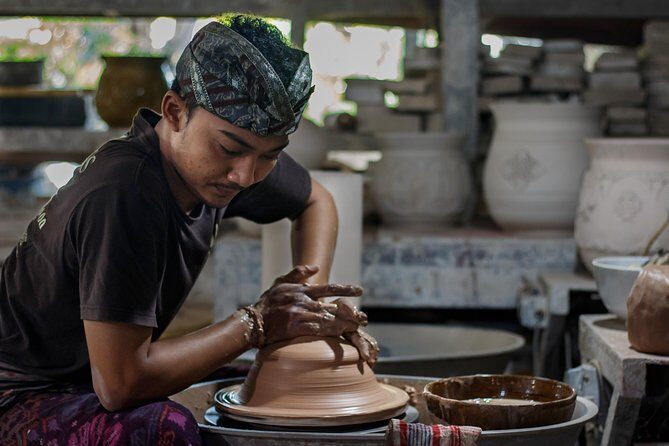
The centerpiece of the experience is wheel throwing, with both machine use and hand technique. You’ll practice forming items using the wheel while learning how to create structure and control the walls and opening.
The class format is also important: you’re experimenting with multiple possible shapes during the session. That’s the smartest way to learn. Instead of locking yourself into one idea, you can test what happens when you change pressure, hand position, and timing.
Expect to spend time:
- getting used to the wheel speed and clay behavior
- practicing how to center and shape
- learning how to balance your hands while the clay spins
A small but meaningful detail: the workshop emphasizes both wheel technique and hand technique. That means you’re learning the two skills you actually need to make ceramic forms on a wheel, not just watching the machine do the work.
One caution from past experience: some learners found that instructors did more than expected and that the session wrapped early. So if you love totally solo crafting, you might want to set expectations upfront with the team and ask how much you’ll handle versus how much they’ll correct. You’re learning basics, but you should still be the one getting your hands into the clay.
Picking Your Best Three: What You Can Bring Home
When the session ends, you won’t be taking home every trial piece. You’ll choose your best three creations to bring home. This is a practical approach: shaping is messy, and the best-looking or best-formed items are usually the ones worth finishing.
The way this works in your favor is simple. During class, you can experiment freely because you’re not stuck deciding immediately. You can keep going until you notice which forms hold shape best.
If you want variety, the class also references coloring materials if you want to vary your art. That’s a plus for beginners who want their final pieces to look more personal, even if they’re still learning the form.
Do note what’s limited: the class includes shaping and preparing choices, but it does not include the full finishing process in the way most people picture it (firing/combustion as part of the package).
Coloring, Glaze Help, and the Real Timeline for Finished Ceramics
Here’s where many people need to adjust their expectations. The class covers forming and basic steps, including mention of the glaze process, but combustion and glaze take time afterward.
The timeframe given is 1 week up to 4 weeks for combustion and glaze. That means your finished pieces are not something you walk out with instantly if you choose full glazing and baking.
And it matters for your trip planning:
- If you’re leaving Bali soon, you need to coordinate pickup or shipping arrangements with the workshop (the class notes that baking and glaze take time, but doesn’t detail delivery options).
- If you just want something to take home quickly, ask whether you can take unbaked pieces immediately, and what that means for use.
Also, the firing cost is not included in the class fee. That’s a key value question, and I’ll break it down next.
You can also read our reviews of more tours and experiences in Ubud

Price and Value: $50 for Shaping, Plus What Might Cost Extra
At $50 per person, this class is competitively priced for a wheel-throwing session that includes:
- all materials during class
- the clay portion (noted as up to 3 kg total clay for experimenting)
- wheel throwing machine usage
- coloring materials if you want to add variation
- bottled water
- an apron
That’s a lot you don’t have to worry about. You show up, you learn, you use the tools, you leave with your best three pieces from the day.
Where the value can feel different is finishing. The class does not include combustion for final product. If you want your pieces fully finished with glaze and baking, plan for extra costs and a waiting period of 1 to 4 weeks.
In one provider response tied to the experience, they explained that the firing fee is not included because adding it would raise the class price a lot. They also said they would give one piece free of charge. That’s a useful detail to ask about directly when you go, because it could influence your final total.
My simple take: this is great value if you want hands-on wheel time and don’t mind the finishing timeline. If your goal is a fully glazed, fired souvenir you can use right away, you should budget extra and confirm the process and total price before class.
Logistics That Matter: Meeting Point, Private Setup, and Weather
You meet at Jl. Nakula No.511, Guwang, Kec. Sukawati, Kabupaten Gianyar, Bali 80582, Indonesia, and the activity ends back at the meeting point.
A couple practical notes:
- Private setup: This is a private activity, so it’s only your group. That usually means you get more direct attention than you would in a big shared class.
- No transportation included: Private transportation isn’t included, and lunch/snacks aren’t included. If you’re coming from central Ubud, you’ll want to plan your own ride or driver.
- Good weather required: The experience requires good weather. If weather causes cancellation, you’ll be offered another date or a full refund.
If you’re booking through a platform, I recommend saving your confirmation details and any messages in your phone before you head out. One past experience included trouble communicating with the booking platform, and it was only solved by finding local help to locate the property.
Who Should Book This Wheel Throwing Class (and Who Might Not)
This class fits best if you:
- want a beginner-friendly start to wheel throwing
- like making fewer, better pieces rather than collecting lots of rough crafts
- enjoy learning in a real working factory environment
- are okay with the fact that glazing and firing take time afterward
You might hesitate if you:
- need a fully finished, baked souvenir immediately the same day
- dislike waiting up to 4 weeks for combustion and glaze
- expect a fully instructor-free workshop where you do everything without guidance
Also, if you’re the kind of person who gets frustrated when something doesn’t look right after the first try, remember: this is an experiment class. The structure with choosing your best three pieces is there to help you stay confident.
Practical Tips to Get Better Results Fast
Here are a few things that will help you leave with a piece you’re happy to choose:
- Ask about the hand technique you should focus on first. Centering and controlling wall thickness are usually the difference between wobble and a clean form.
- Make multiple tries early. The clay and time are there for experimentation. Don’t wait until the last hour to test shapes.
- Pay attention to your pressure. Too much pressure can collapse the form; too little makes it hard to build structure.
- Decide your favorites before you go too far on the last attempt. Once you find a form that behaves well, build on it.
- Confirm what is included for your final piece finish. The class fee covers shaping; combustion is not included. Ask how many pieces qualify and what the pricing looks like if you want fully glazed and baked results.
If you do those things, you’ll have a much smoother session and a better selection of your best three pieces.
Should You Book This Class? My Honest Call
Book it if you want a hands-on beginner wheel-throwing lesson in a real ceramic factory setting, with materials included and enough clay to experiment. The $50 price works well for what you get: machine time, instruction, and the chance to take home up to three pieces.
Hold off or ask extra questions first if your trip is short and you need your finished items right away. Because glaze and combustion take 1 to 4 weeks and combustion is not included, you could end up surprised by extra time and cost.
My advice: go in knowing you’re paying mostly for the learning and shaping, not the final fired product in your hands that same day. If that matches your expectations, you’ll likely have a fun, memorable craft session.
FAQ
How long is the wheel throwing class?
The class runs about 3 hours.
Where does the class start, and does it end there too?
You meet at Jl. Nakula No.511, Guwang, Kec. Sukawati, Kabupaten Gianyar, Bali 80582, Indonesia, and the activity ends back at the meeting point.
What is included in the $50 price?
Materials for the session, wheel throwing machine usage, coloring materials if you want to vary your art, bottled water, and an apron are included.
What is not included?
Private transportation, lunch, snacks, and the combustion process for the final product are not included.
How much clay will I use during the class?
You will experiment with clay, and the class notes the clay is scaled in up to 3 kg for the session.
How many pieces can I take home?
You can bring home up to your best three creations, based on what you choose at the end of the class.
Is glazing and baking included?
The class includes help with glaze, but combustion for the final product is not included in the class price. Glazing and combustion take additional time.
How long does combustion and glaze take?
Combustion and glaze take 1 week up to 4 weeks.
Is this class private?
Yes. It’s a private tour/activity, so only your group participates.
What if weather is bad?
The experience requires good weather. If it’s canceled due to poor weather, you’ll be offered a different date or a full refund.